Install (On-Premises)

We offer support for on-premises installations of Business Central from version 14 onwards. Please note that a Premium Tier subscription is required for on-premises installations of Business Central. Additionally, please be aware that upgrades to on-premises software may incur additional fees.
This installation manual is for Business Central on-premises. For the Cloud version of Business Central, please refer to these instructions.
If you have already installed the apps and wish to upgrade to the latest version, please follow steps 1 and 3:
Step 1: Install the Connector App, and
Step 3: Install Power BI Apps
Installation Prerequisites
Before proceeding with the installation, it's important to review the installation prerequisites to ensure a smooth installation process.
Prerequisite 1: Update Business Central License
To install the Power BI Insights Business Central Connector app, you will first need to add our Power BI Connector module to your Business Central license. Here's how:
Contact your Business Central implementation partner and ask them to provide us their 'Reseller PartnerSource Business Center Account Number'.
We will then add your partner as our Authorised Reseller.
Once your partner has been added as our Authorised Reseller, they can update your Business Central license and add our module, which is called '70644575 Power BI Insights Connector'.
After the license is updated, your Business Central implementation partner can install the Power BI Insights Connector as described in Step 1.
Prerequisite 2: Check OData Web Services
Before proceeding, please confirm that you''re able to connect to your Business Central via OData web services. Contact your implementation partner to verify whether your OData web services are publicly accessible over the internet or only accessible within your network. If your OData web services aren't publicly accessible, you'll need to install the Power BI Data Gateway to access your on-premises data.
Prerequisite 3: Make sure you can access the on-premises installation folder
To gain access to the Power BI Connector .app installation file and Power BI installation links, please send us a list of the users who require access.
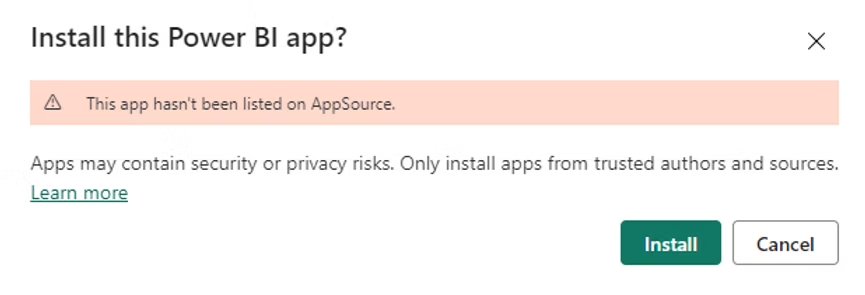
Prerequisite 4: Enable ‘Install template apps not listed on AppSource'
To enable 'Install template apps not listed on AppSource' in the Power BI Admin portal, please follow these instructions.
Our apps can be installed in five simple steps!
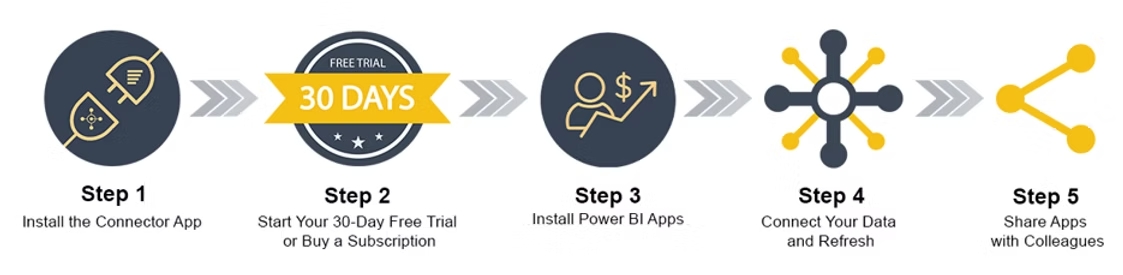
Step 1: Install the Connector App
1. Download the .app runtime package file from here.
2. Install the .app file.
Here you can find information on how to publish and install an extension.
Please add '-Mode ForceSync' at the end of the Sync-NAVApp command.
You can safely ignore the following warning during installation: WARNING: The package has been built on a server with a different version than the current server version.
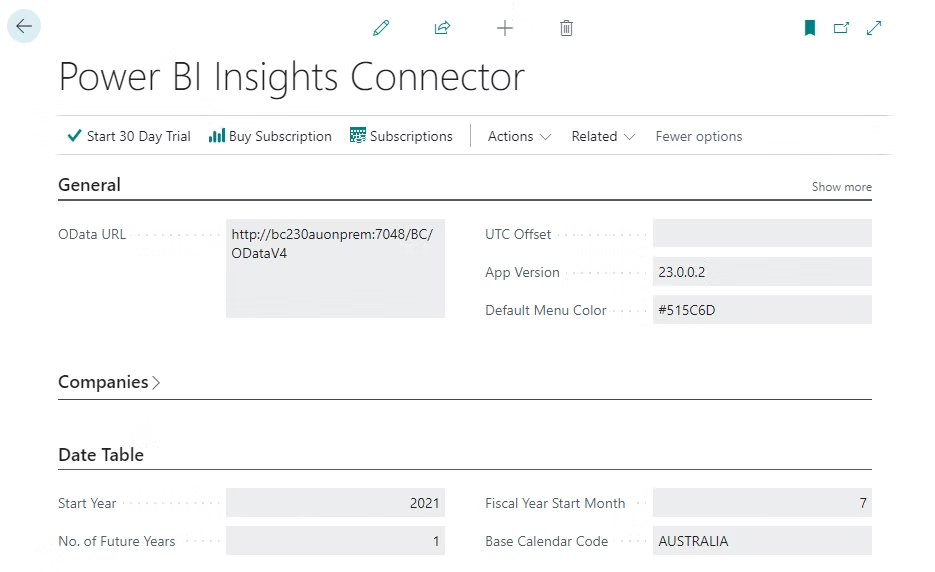
3. Open the Power BI Insights Connector App.
Step 2: Start your free trial
To activate your 30-day trial, please refer to the instructions provided here.
Step 3: Install Power BI Apps
1. Open the 'On-Premises Power BI Installation Links' file accessible here.
2. To install Power BI Apps, simply click on the provided download link.
3. Click Install.
Step 4: Connect your data and refresh
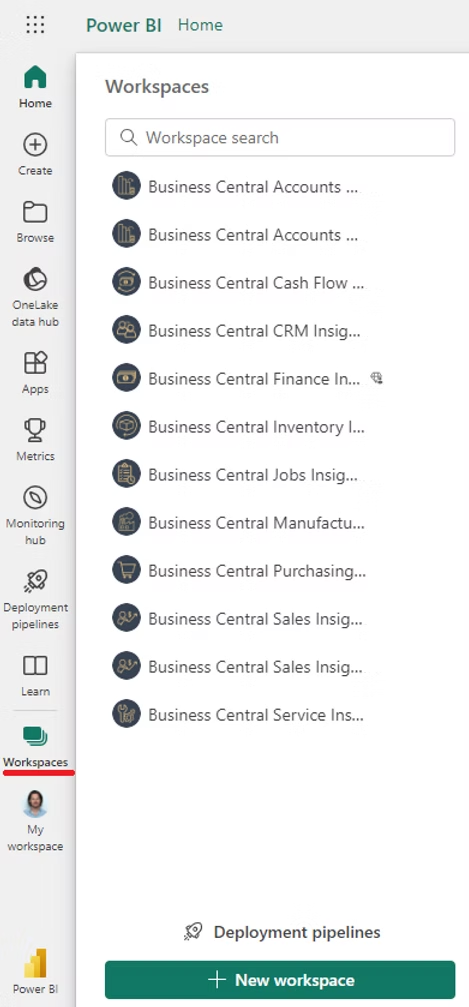
Each app will install its own Power BI app workspace. For example, the 'Business Central Sales Insights' app will have a dedicated 'Business Central Sales Insights' workspace.
1. Sign in to Power BI.
2. Select Workspaces menu and open the workspace.
3. Choose Connect your data.

4. Get the OData URL parameter.
The OData URL is a connection to your Dynamics 365 Business Central system. It should look something like this: https://api.businesscentral.dynamics.com/v2.0/11111111-1111-1111-1111-111111111111/Production/ODataV4/
You can find the OData URL link in the connector app"
a. Open the Power BI Insights Connector app.
b. Copy the OData URL.

5. Paste the OData URL in the Environment parameter.
It is recommended that you leave the Company Filter value as 'All' to ensure that all the companies you enabled in the Connector app are imported into Power BI.

If your OData web services are publicly accessible via the internet (i.e., outside your firewall), please ensure that the OData URL starts with 'https'.
If your OData web services are not publicly accessible, you can still access your on-premises data by installing the Power BI Data Gateway. This involves installing the gateway and adding the data source in Power BI Service (specifying the 'OData' Data source type).
Please ensure that your hosting server meets the recommended installation requirements.
For more information about the Power BI Data Gateway, you can refer to the official Microsoft documentation.
6. Select the OAuth2 or Basic authentication method and click Sign in and connect.
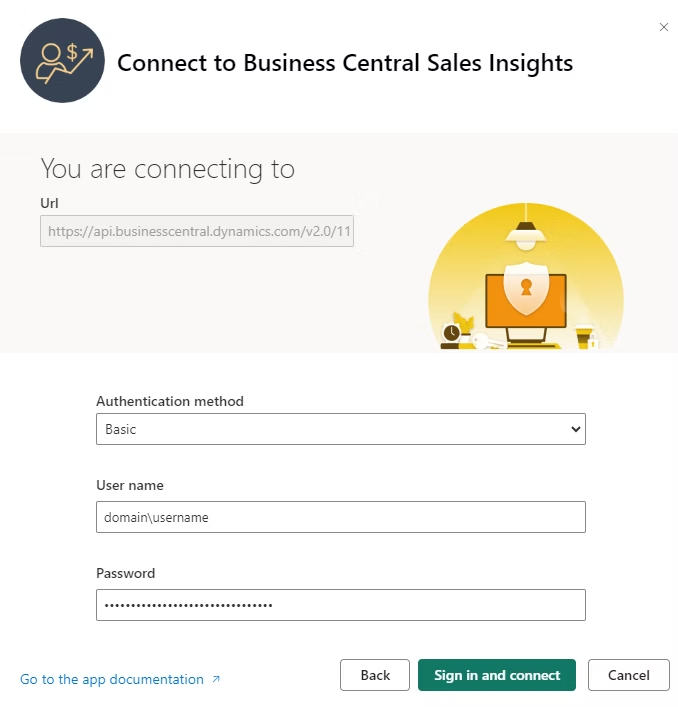
If the OAuth2 authentication is not supported in your On-Premises installation, then use the Basic authentication method (Web Service Access Key).
a. In Business Central open User Card and Generate Web Service Access Key (see the instructions here).
b) In Power BI select:
Authentication method: Basic
User name: <your user name>
Password: Web Service Access Key
Consult with your Business Central implementation partner which is the recommended OData web services authentication method for your installation.
7. Sign in with the account that has dedicated permissions to access data in Dynamics 365 Business Central system.
This account will be used by the Power BI service to connect to Business Central when refreshing its data.
To assign User permissions in Business Central, follow these steps.
8. After you’ve successfully signed in with the Business Central user account, the dataset refresh will start automatically! Happy days!
9. Schedule automatic data refresh
By default, data is refreshed once a day (at midnight). If you would like to set specific data refresh times, please follow the instructions provided here. With a Power BI Pro license, you can refresh your data up to 8 times per day.
10. Enable Azure Maps
If you encounter the error message "Azure Maps are not enabled for your organization," please refer to the following troubleshooting article.